The first fly in the Mikes salmon fly section is the Lady Caroline Spey. Mike thinks you start with this one when entering the world of tying salmon flies.
pictures & descriptions by Mike Townend, Aberdeen.
strip the breast feather back to the tying in point and mount to the hook.
make sure your tail is running straight with the hook
I have tied in a flat gold, if you look at a clock face it would sit about 2 oclock. I have tied in a gold oval and that would sit around 5 oclock. I have tied in a silver oval this would sit around 7 oclock.
Just another view of the tying in points.
strip one side of the heron, tie it in by the point and tied along aside the flat gold.
I have roughly mixed olive and brown burling wool. dubbed on to the thread not overly because Dee’s and spays were thin bodied.
wound on my flat and gold tinsels, you can see I have kept them roughly evenly apart.
wound on my flat and gold tinsels, you can see I have kept them roughly evenly apart.
once you have tied in your tinsel you can pull the outer skin of metal back and trim half of the silk core back to help keep the head size down.
(now I take my silver tinsel and counter wrap it in the opposite direction of the first three. next I run up my heron hackle. now I take my silver tinsel and counter wrap it in the opposite direction of the first three). this part is wrong it should be: I have run up my silver tinsel in the same direction as my gold tinsel. I have wrapped the heron hackle in the same direction.
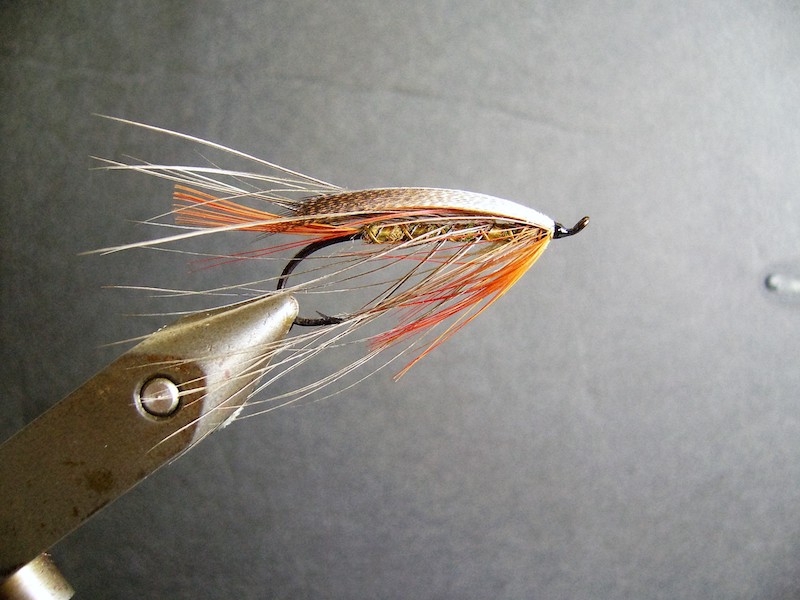
Next put on a red breast feather of a GP.
there’s a certain point of a bronze mallard feather you’d want to use, here you can see I have stripped my feather ready for use. you can see I have indicated which part of the feather I want to use. when using bronze mallard you must tie in the grey section of the mallard.
I have cut 2 sections out of the mallard. Cut one slightly wider than the other. here’s an old trick: you could use a tiny amount of liquid wax on the waste side of the wing and allow 10 minutes to dry, be very careful of this stuff as it leaches like mad. make sure you have got ample waste you’ll find this trick comes in very handy when multiple winging. I have seen some old knoxy type flies which have up to 6 pairs of mallard on the big boys.
first we need to reverse the thread to place the nearside wing on the same as before.
when it comes to mounting the wing you need to reverse your thread. how to do this is, take a needle, put a loop of thread around it and turn the thread in the direction you want to go with 3 turns over your loop. I always start on the opposite side I find that the hardest. I’ve laid my wing up against the hook and secured with a couple of turns.
first we need to reverse the thread to place the nearside wing on the same as before.
again another front view
now mount the nearside wing. my thread direction is coming from the bottom upwards over the top. now varnish your tying in points. leave it for a few minutes and remove waste.
heres a front view of the fly
whip finish and varnish (at least three times)